
How To Enable HTTP/3 on WordPress With Cloudflare (2026 Guide)
Table of Contents
The first time I enabled HTTP/3 WordPress Cloudflare on a site, I expected fireworks. What I got was quieter, like swapping an old gravel road for smooth pavement. Pages didn’t magically shrink, but they arrived via the QUIC protocol with less hesitation, especially on mobile. These improvements contribute to better Core Web Vitals and a lower Time-to-First-Byte.
If you’re already using Cloudflare, you’re close. In March 2026, Cloudflare’s HTTP/3 support is mature and stable, and many zones have it on by default. Still, I like to verify it, because “on” in a dashboard and “negotiated in a real browser” are two different things.
This guide walks through enabling it, confirming it’s actually working, and fixing the common gotchas.
What HTTP/3 changes (and what it doesn’t) on a WordPress site
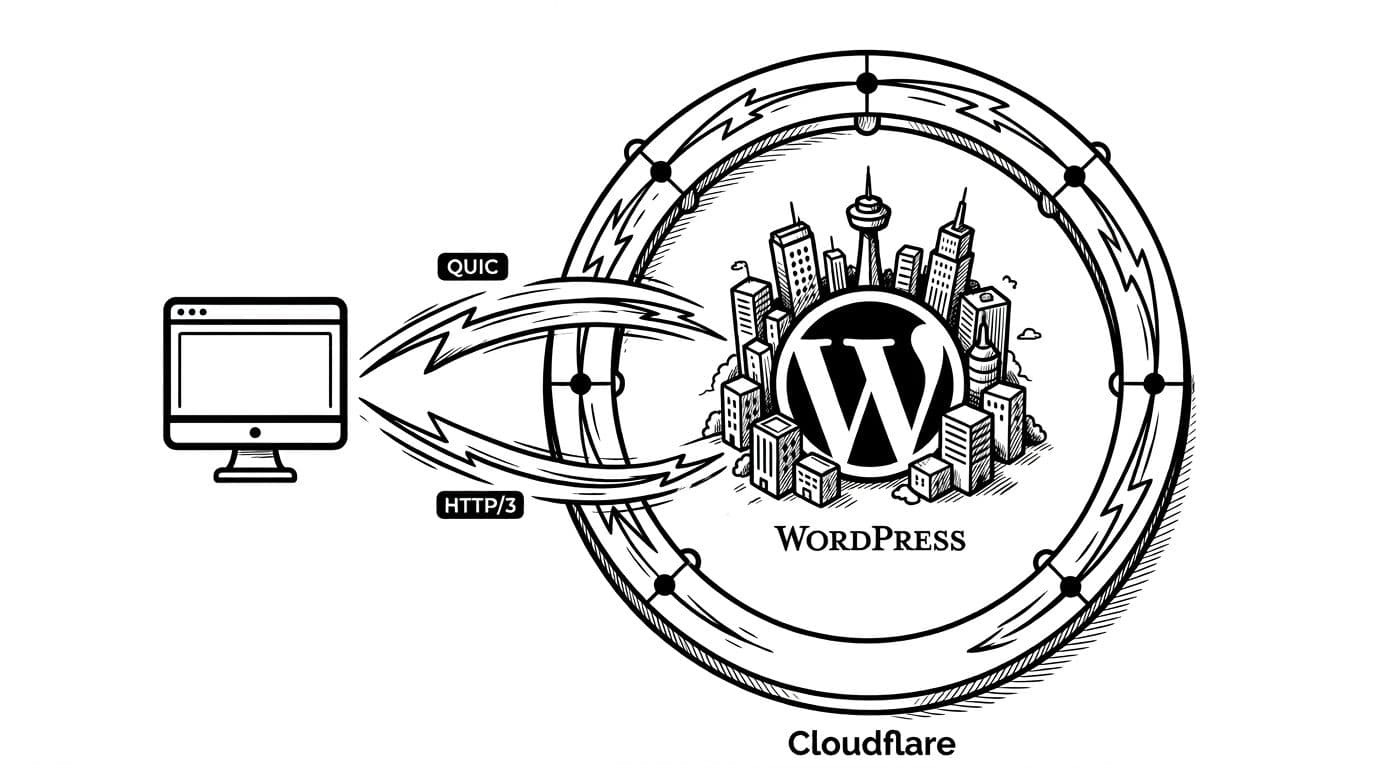
HTTP/3 is HTTP over the QUIC protocol, which runs on UDP instead of TCP. That sounds like trivia until you’re on a flaky coffee shop Wi-Fi. The QUIC protocol handles packet loss better, and it avoids some of the stop-and-go behavior that older connections can fall into.
Here’s the key thing I keep in mind: HTTP/3 is mainly between your visitor and Cloudflare’s edge, not between Cloudflare and your WordPress host (unless you’re doing special origin setups). So, it often helps most when you have lots of small requests for static assets like fonts, CSS, JS, and images, and visitors on imperfect networks. HTTP/3 significantly improves Largest Contentful Paint by delivering these static assets more efficiently.
If your origin server is slow, HTTP/3 won’t “fix” that. It can reduce connection delay, but it can’t make a slow database fast.
Why it matters for real people (not just test tools)
- Mobile visitors feel it first: QUIC tends to behave better on cellular switching and mild packet loss, reducing network latency.
- Snappier repeat clicks: back/forward navigation and browsing around can feel less sticky.
- Less handshake overhead: fewer round trips can shave time off the start of a request.
If you want deeper context from Cloudflare’s own ecosystem, I also keep their documentation handy, especially when a site is on WordPress.com or has unusual DNS constraints. See Cloudflare’s WordPress.com and Cloudflare notes.
Turn on HTTP/3 in Cloudflare (paths, toggles, and quick checks)

Before I touch Cloudflare settings for WordPress, I do one quick reality check: is Cloudflare actually in front of the site?
Step 1: Confirm Cloudflare is proxying your domain
In Cloudflare, go to: Websites → your site → DNS → Records.
Your main record (A, AAAA, or CNAME) should show the orange cloud (DNS proxy, Proxied). If it’s gray (DNS only), HTTP/3 at Cloudflare won’t apply to visitors.
Why it matters: no proxy, no Cloudflare edge, no HTTP/3 negotiation.
Step 2: Enable HTTP/3 (dashboard path may vary)
Cloudflare has moved settings around over the years, so the label might shift. I usually find it in one of these places:
- Speed → Optimization → HTTP/3 (with QUIC)
- Sometimes: Network → HTTP/3 (with QUIC)
Toggle it On.
Step 3: Make sure TLS is modern enough
Go to: SSL/TLS → Edge Certificates and confirm:
- TLS 1.3 is On (enabling 0-RTT Connection Resumption for repeat visitors)
- (Optional) Always Use HTTPS is On, if your site fully supports HTTPS
This tiny table is the setup I aim for on most WordPress sites:
| Setting | Cloudflare path (UI may vary) | Recommended |
|---|---|---|
| HTTP/3 (with QUIC) | Speed → Optimization (or Network) | On |
| TLS 1.3 | SSL/TLS → Edge Certificates | On |
| Always Use HTTPS | SSL/TLS → Edge Certificates | On (if safe) |
| HTTP/2 to Origin | Speed → Optimization | On (nice to have) |
| Brotli compression | Speed → Optimization | On |
| Early Hints | Speed → Optimization | On |
| Rocket Loader | Speed → Optimization | On (if JS heavy) |
For WordPress users, Automatic Platform Optimization is the premier choice to further enhance speed. Page Rules can be used for custom caching configurations if needed.
If you want a longer, end-to-end view (including origin considerations), I’ve found DCHost’s HTTP/2 and HTTP/3 playbook useful for background reading.
Verify HTTP/3 is live (and fix it when it’s not)
I never trust a toggle alone. I want proof from a browser or a command line.
Check 1: Cloudflare trace (fastest sanity test)
Visit: https://YOURDOMAIN.com/cdn-cgi/trace
Look for a line like h3=on (format can vary). If the page doesn’t load, your DNS record may not be proxied.
Why it matters: it confirms your Content Delivery Network processes the request at the edge, where edge caching and Smart Tiered Cache boost the Cache HIT ratio for faster loads.
Check 2: Chrome/Edge DevTools (no tools installed)
- Open DevTools → Network
- Right-click the column headers → enable Protocol
- Reload your page
If HTTP/3 is working, you’ll often see h3 for requests.
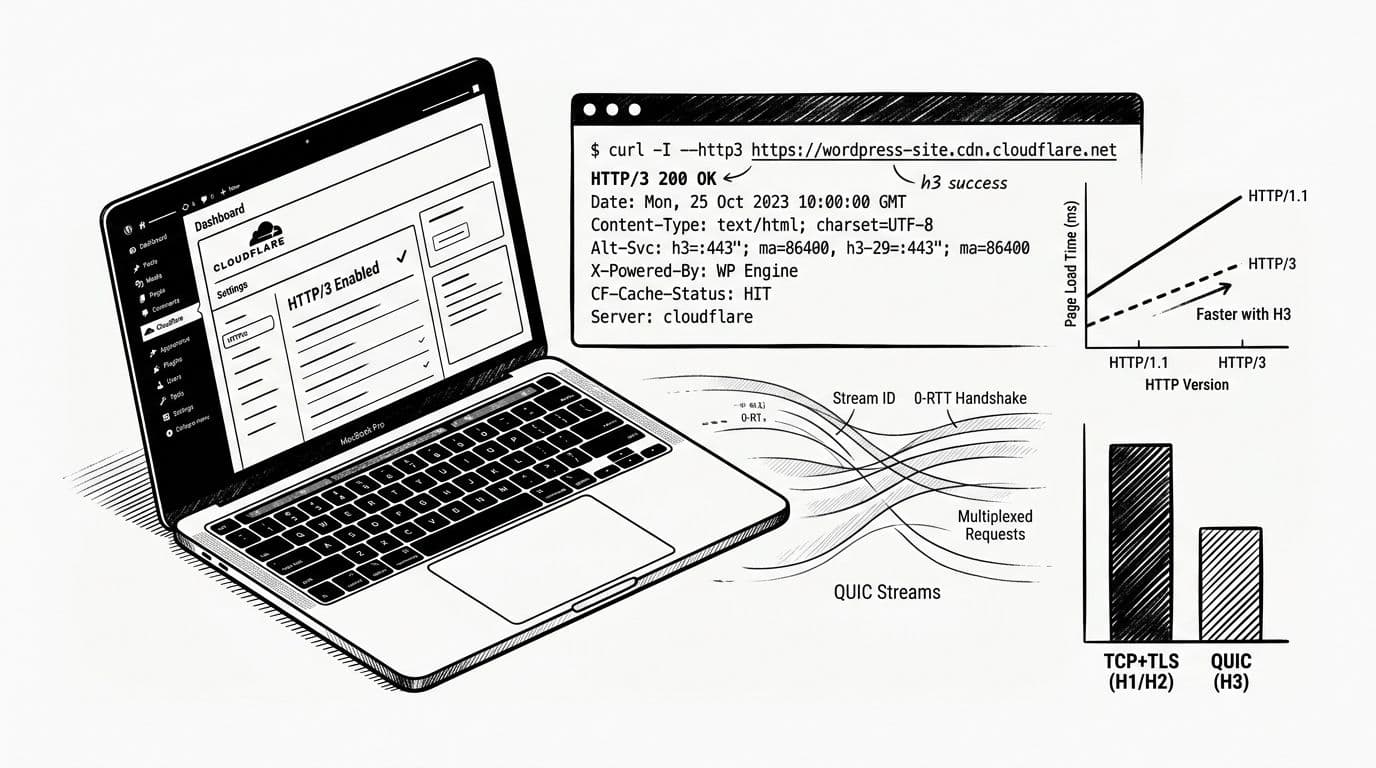
Check 3: curl with HTTP/3 (best “hard proof”)
You need a curl build that supports HTTP/3. Then run:
curl -I --http3 https://YOURDOMAIN.com/- Also run:
curl -I https://YOURDOMAIN.com/and look for thealt-svcheader, often containingh3=":443".
What I want to see:
- The
--http3request succeeds (no handshake failure). - The normal HTTPS response advertises HTTP/3 via
alt-svc.
A common surprise: your site can advertise HTTP/3 (alt-svc) but still fail to connect over h3 on a network that blocks UDP/443.
Troubleshooting decision points (if X, then Y)
- If
--http3fails but normal HTTPS works, try a different network (mobile hotspot). Some offices and ISPs block UDP/443. - If Cloudflare trace doesn’t show h3, confirm the DNS record is orange-cloud proxied. Also confirm you’re not bypassing Cloudflare with a direct origin hostname. Enable Bot Fight Mode to ensure origin server resources go to real users.
- If DevTools never shows
h3, wait a few minutes, then hard refresh. Also test in another browser, because protocol negotiation can vary. - If only some pages show
h3, check for mixed hostnames (www vs non-www) and make sure both hostnames are proxied and covered by SSL. Run PageSpeed Insights to verify impact on Core Web Vitals.
For a Cloudflare-focused walkthrough that mirrors what you’ll see in the dashboard, Reintech’s HTTP/3 on Cloudflare explainer lines up well with how the feature behaves in practice.
One WordPress-side move that pairs well
HTTP/3 helps delivery, but WordPress still needs to stay lean. On sites where I’m serious about speed, I pick one good caching/performance plugin (not five). Enable Image Optimization with WebP conversion to reduce payload, Automatic Signed Exchanges for better Google Search performance on mobile, Browser Cache TTL, and Extensible Priorities as advanced tweaks. Check PageSpeed Insights again to confirm gains in real-world performance.
If you’re comparing options, this roundup of best WordPress performance plugins is a solid starting point.
Conclusion
When HTTP/3 is working, the web feels less like a stoplight and more like a rolling green, with faster Time-to-First-Byte and improved Largest Contentful Paint. Cloudflare makes it a quick switch, but I always verify it with DevTools, trace, or curl so I’m not guessing. Once you confirm it is negotiated, you can focus on the bigger wins, clean caching, lighter plugins, and faster pages that keep visitors moving. These Cloudflare settings WordPress are essential for a fast Content Delivery Network experience in 2026.